A patio heater, just like every other appliance needs periodic servicing. When checking your guide, you will probably have very good directions on how to assemble and run your patio heater. Generally, there may even be some helpful troubleshooting information if your outdoor patio heater doesn’t operate correctly. But there is something the product doesn’t bother to let you understand.
The warmer seasons are generally ending and you get your terrace heater out of storage, willing to warm up those brisk morning and colder nights. Anyone turn on the natural gas offer or make sure you have an entire propane tank. Friends and family are generally eagerly waiting to stand-by position the patio heater, and that means you go to light it up.
Making use of the outdoor heater before, you already know to turn the knob for you to pilot and depress typically the ignition button… click, plus it doesn’t light. Okay, anyone try it again, click plus it doesn’t light again. Your friends and relatives continue to wait patiently, however slowly start to move inside and out of the chill. A person checks the gas supply once again and tries the combustion process a few more times, however, decides to move the celebration inside.
The next day you what is instructions and troubleshooting manual, but still can’t get your outdoor patio heater to light as well as think you may need a new outside heater to move the collecting outdoors once again. However, in case you knew a few maintenance suggestions, you might be able to save yourself the price of a new patio heater and again be the life of the celebration.
What most patio heating instructions won’t tell you is a covered or stashed heater is a favourite brand name spiders and other little pests. The cool, dark confined space makes for a superb nesting location for our 8-10 legged friends. The dust, nest and spider chain created during the period of nonuse within your patio heater, blocks give her very functioning parts, making it not ever work properly or by any means. Unfortunately, without dismantling some key parts, you would by no means be able to see the problem manufactured by the web, debris or call home. If your patio heater is greater than a year old, more than likely it’s out of warranty and the producer won’t offer much assistance.
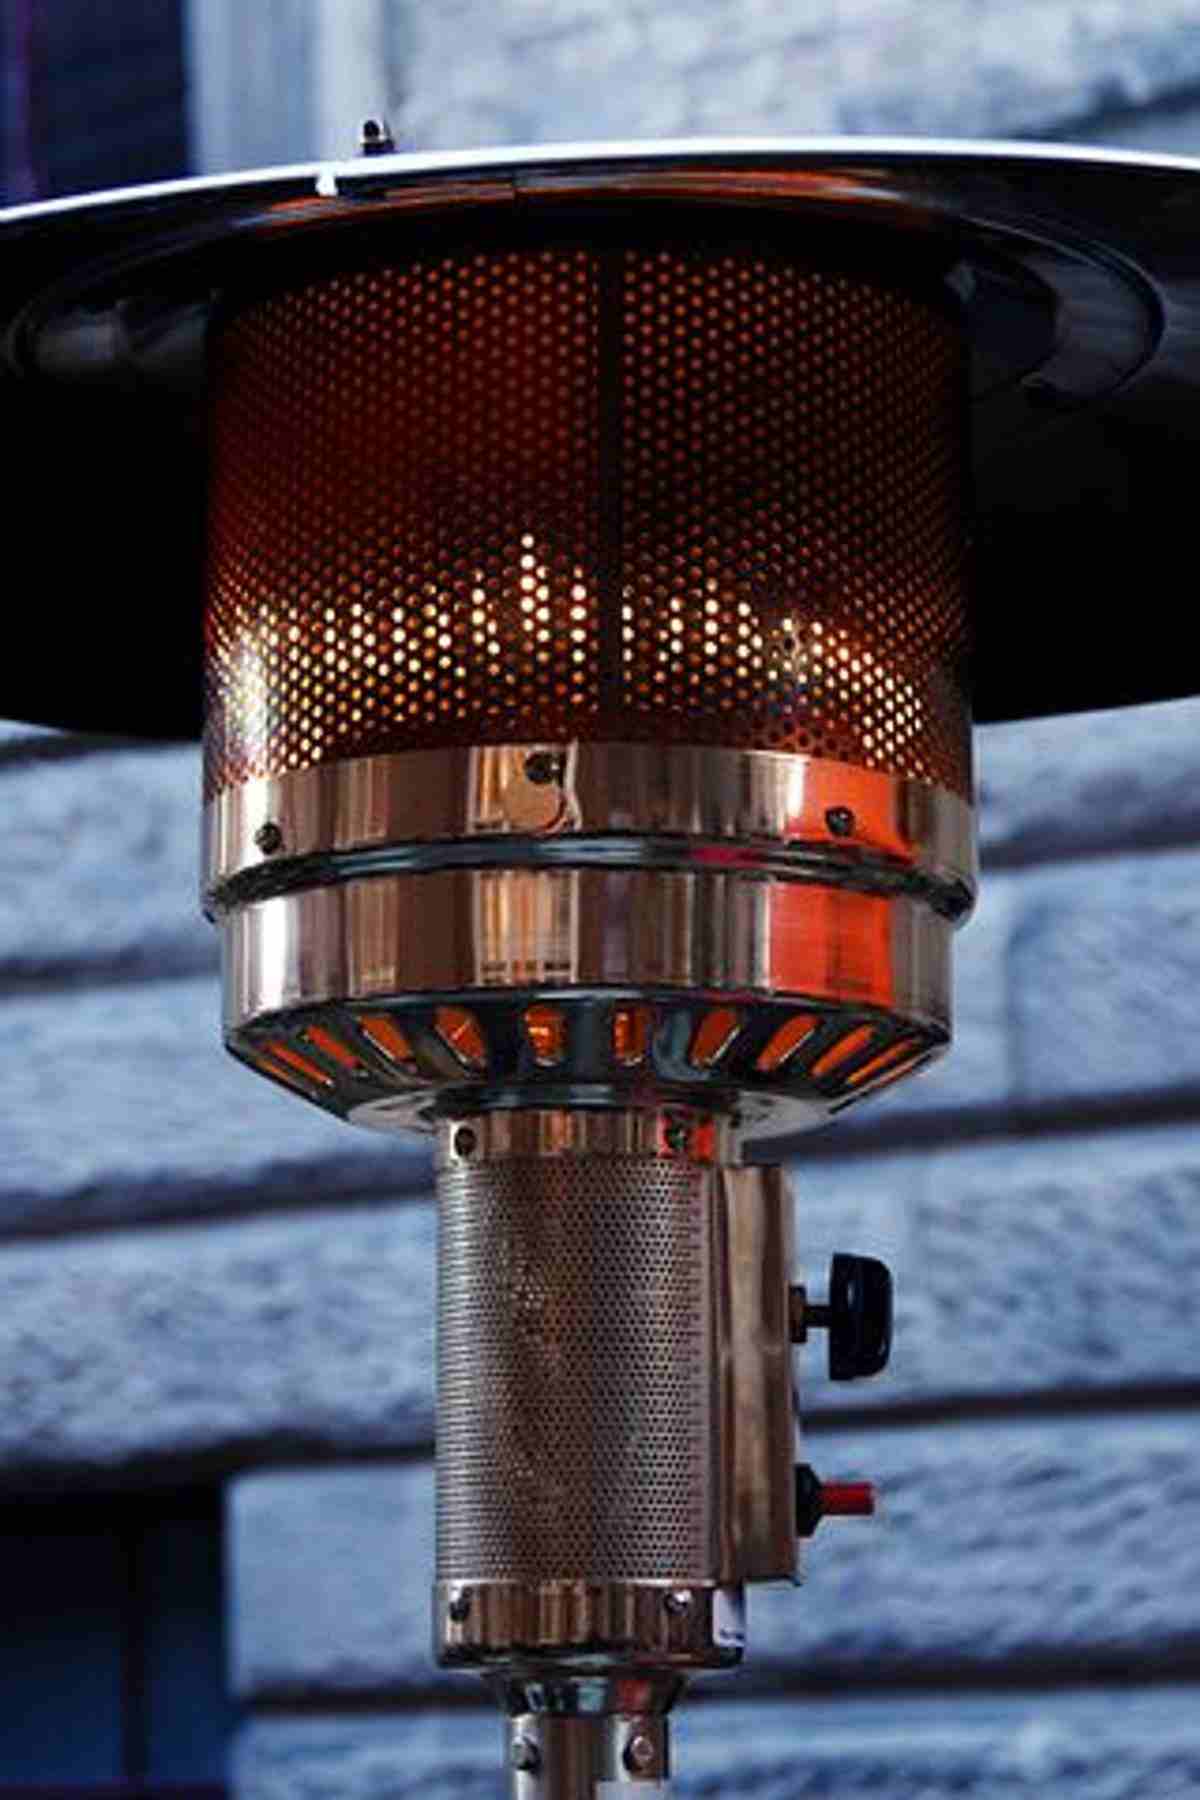
So what do you do right now to get your outdoor patio heater in operation? Almost all-natural gas or even propane patio heaters retain the same components of a managed valve, a pilot, the thermocouple and the main furnace. Getting to and cleaning these types of components is essential to having your own outdoor heater working once again.
Cleaning the internal parts of your own Patio Heater:
Note: Always be certain the patio heater is actually cool, with any propane supply disconnected.
1 . Get rid of the hood or reflector along with the emitter screen. The areas are usually attached to the main ripper housing with four anchoring screws. Once this is removed, you could access the main burner, start and thermocouple.
2 . Get rid of the main burner, which is normally attached to a bracket using anywhere from two to a number of screws. Once the main ripper is removed, you will have usage of the main burner orifice. Typically the orifice is a small brass installation with a tiny hole, calculated in gauges. This small hole can become clogged or even obstructed by the debris, home or web, left by the spider. Since very little or any gas can pass through the actual obstruction, the outdoor heating unit will not create a flame or even will have a very yellow sooty flame.
3. With a wrench or socket set, eliminate this orifice for cleaning. To clean, use compressed air flow or a needle to remove any kind of obstruction.
4. Check the preliminary for any other obstructions. Sometimes, the pilot orifice, such as the main burner orifice, should have leftover deposits from the bumblebees. This brass fitting should have an even smaller hole how the main burner orifice. Taking away the pilot orifice might be tricky, as different suppliers will secure the start in different manners. Most jet pilots, however, will be connected to some sort of bracket holding the start and thermocouple.
Loosen this kind of bracket so you will have cost-free access to the pilot. Typically the pilot orifice will be on top of the small copper conduit and just under the pilot. Eliminate the pilot and then remove the initial orifice. Clean the pilot hole in the same manner as the main burning orifice with the compressed atmosphere or a needle.
5. Around the main burner, there should be a couple of openings near the bottom of the burner, these are called the venturi. Make sure the opening is usually clear of any obstructions, thus air can be mixed effectively with the gas.
6. With patio heater parts cleaned out, reassemble all the parts backwards order from above, but DO NOT re-attach the hood (reflector).
7. Reconnect and turn on your personal gas supply. Following your personal operation manual, light your personal patio heater only too often in the pilot position. While getting the control knob depressed inside the pilot position, check to check out that the pilot is illuminated, with the flame touching the highest of the thermocouple. After you have follow-through, release the control penis (about 30 – 70 seconds) and the pilot must remain lit. If it would not, wait for the heater to great and follow the pilot hole cleaning instructions above. Reassemble and light the pilot once more.
8. Once the pilot stays lit, turn the handle knob to the high placement. If the main burner hole was cleaned properly, you ought to see a 4 – 6th-inch blue flame together with orange-yellow tips. If the fire is almost all yellow, then obstructions in the burner venturi were not cleaned properly. The particular venturi allows air to combine with gas to shed clean. If no weather mixes with the gas, a new yellow and dirty relationship is produced.
9. Together with the pilot and main burners now in perfect surgery, wait for the patio heater to help cool then reassemble often the emitter screen and engine back onto the homes bracket, using the same anchoring screws provided
10. Light your current patio heater and your last business and be ready to have a good party, gathering or backyard dining experience once again.
You should be aware that with either a propane or propane patio water heater if you are uncomfortable with gasoline appliances, contact a qualified gasoline technician.